Models and Databases
Rango Requirements
Let’s say you have the following requirements for the Rango Application:
- Rango is a web page directory
- Rango has a list of web page categories
- Each category houses a list of web pages (one to many relationship)
- The Rango index page will display the list of categories
- A user will be able to select a category, and Rango will display the list of web pages for that category.
- Each category has a name.
- Each page refers to a category and has a title, url and an integer to record the number of times it has been viewed.
Building Models
To do this you’ll need to set up a database with two main entities Category and Page, where one Category can have many Pages. Django provides a neat way to create your database via its object relationship mapping machinery.
So let’s get started. First you will need to edit the settings.py file and configure the database. Set ENGINE to: django.db.backends.sqlite3, and NAME to the full path of the name of the file that will be your database.
DATABASES = {
        'default': {
        'ENGINE': 'django.db.backends.sqlite3',
        'NAME': '/absolute/path/to/code/tango_with_django_project/rango.db'
        ...
}
}
Since you are using sqlite3 you wont need to set the other parameters. Sqlite3 is a lightweight database backend which makes life easy. However, it is possible to specify other backends, such as oracle and mysql (see https://docs.djangoproject.com/en/dev/ref/settings/#std:setting-DATABASE-ENGINE for more details.)
Creating Models
To create models for Category and Page you need to open up models.py in rango and create two classes inherited from django.db.models.Model, add the following lines of code for each of the models.
Model: Category
class Category(models.Model):
        name = models.CharField(max_length=128, unique=True)

        def __unicode__(self):
                return self.name
Model: Page
class Page(models.Model):
        category = models.ForeignKey(Category)
        title = models.CharField(max_length=128)
        url = models.URLField()
        views = models.IntegerField()

        def __unicode__(self):
                return self.title
Each class in the code represents a table/model (i.e. Category and Page) and fields associated with each model/table ( see https://docs.djangoproject.com/en/dev/topics/db/models/ ). These can be easily defined using the different fields provided by Django. A few of the common fields that Django provides are:
- CharField
- IntegerField
- URLField
- DateField
In the Page model, the URLField has been used to define the url field. URLField will check that a valid URL is entered.
Each field comes with a set of parameters (see https://docs.djangoproject.com/en/dev/ref/models/fields/ for details). For each of these fields it is possible to define:
- a default value
- whether the field is required or not
- whether a field can be NULL
- whether it needs to be unique
For example, in Category model the name field has been set to be unique. Thus, all names will need to be different.
Django also provides a number of ways to relate classes/tables together ( see https://docs.djangoproject.com/en/dev/topics/db/models/ ):
- ForeignKey: to define a one to many relationship
- OneToOneField: to define a one to one relationship
- ManyToManyField: to define a many to many relationship
For each model created, an id field is automatically created - so you don’t need to explicitly define a primary key. To relate table/models together you can use one of these relationships - here Page references the Category model with the ForiegnKey relationship which defines the 1-to-many relationship between these entities.
Note: It is good practice to define the __unicode__ method, which is very similar to the __str__ method. The admin interface provided by Django uses the __unicode__ method when it presents a list of the objects/rows.
Creating and Synchronising the Database
Now that we have the models setup we can get Django to work its magic. At the command prompt issue:
python manage.py syncdb
and follow the instructions. You will notice that a number of tables have been created, including rango_category and rango_page. Now issue:
python manage.py sql rango

This should output:

BEGIN;
CREATE TABLE "rango_category" (
    "id" integer NOT NULL PRIMARY KEY,
    "name" varchar(128) NOT NULL
)
;
CREATE TABLE "rango_page" (
    "id" integer NOT NULL PRIMARY KEY,
    "category_id" integer NOT NULL REFERENCES "rango_category" ("id"),
    "title" varchar(128) NOT NULL,
    "url" varchar(200) NOT NULL,
    "views" integer NOT NULL
)
;
COMMIT;
This shows you the SQL code that Django generates on your behalf, and Django also sets up and creates the database which is housed in rango.db.
Thank you, Django!
It is possible to access these models and add data to them via the shell by running:
python manage.py shell
Then in the shell:
from rango.models import Category

# show the current categories
Category.objects.all()
[]

# create and save a new category
c = Category(name="test")
c.save()

Category.objects.all()
['<Category: test>']
This example shows how you can access the models and save data to the database. See https://docs.djangoproject.com/en/dev/intro/tutorial01/ for other examples of how to manipulate the classes.
Later you will be accessing the data stored in models via your views. But before doing this, set up Django’s Database administrator which lets you easily view and modify the data in the database (via a built in Django application).
Warning
Anytime that you change the models, by adding/changing/deleting a field or its properties, or adding/changing/deleting a model, then you should delete the db file and then syncdb each time. Otherwise, you may run into problems, where the models do not match the tables in the database.
Configuring the Admin Interface
Django provides a neat admin interface that lets us browse and edit data in our models/tables. To activate this functionality we need to setup a few things.
- In your settings.py file uncomment django.contrib.admin in the INSTALLED_APPS settings.
- Run python manage.py syncdb. This is necessary because you have added a new application to your project and for it to work some additional models/tables are required.
- In tango_with_django_project/urls.py uncomment the reference to the admin to look like:
from django.conf.urls import patterns, include, url
import settings

# Uncomment the next two lines to enable the admin:
from django.contrib import admin
admin.autodiscover()

urlpatterns = patterns('',
        url(r'^rango/', include('rango.urls')),
        url(r'^admin/', include(admin.site.urls)),
)
- In your rango directory, create a file called admin.py and put in the following lines of code:
from django.contrib import admin
from rango.models import Category, Page

admin.site.register(Category)
admin.site.register(Page)
Now run your webserver and go to http://127.0.0.1:8000/admin/. Log in with the username and password that you set up when you first ran syncdb.
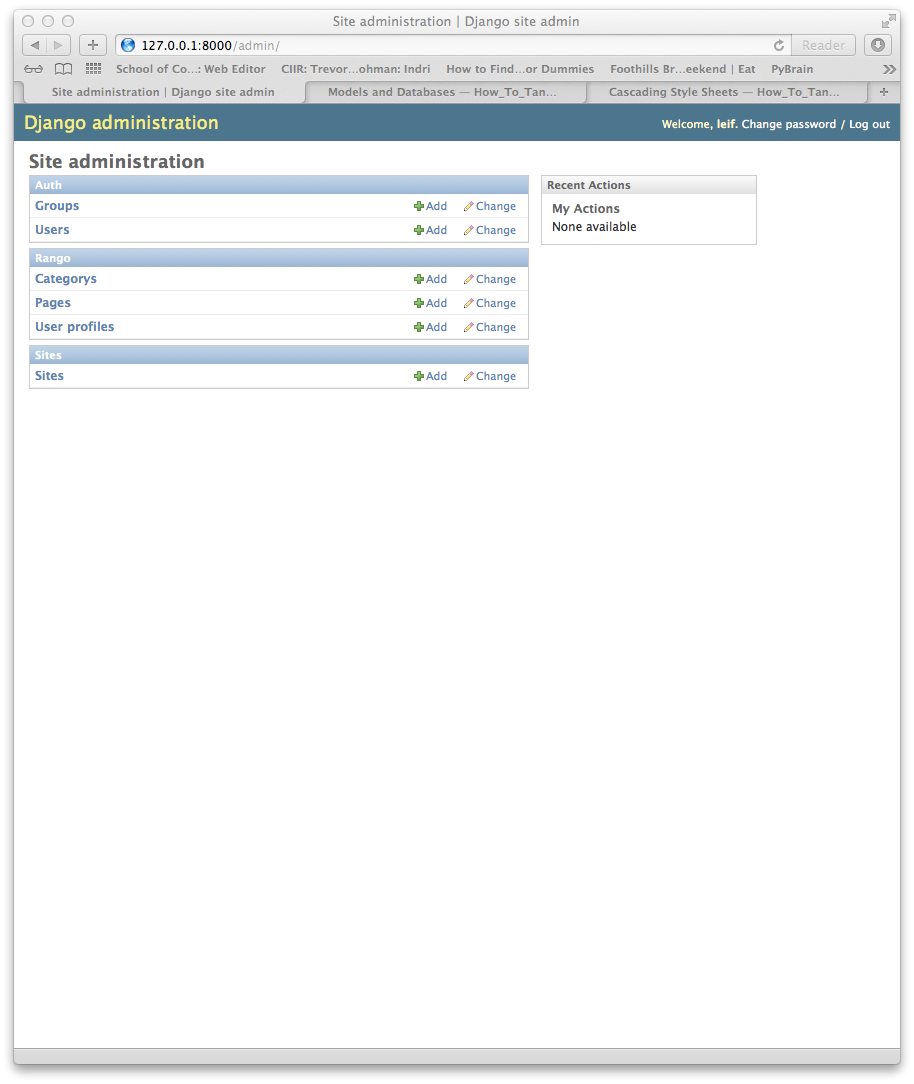
The admin interface
If you click on the Category link you will see the test data that we saved to the database, which you can edit/delete. Also from here you can add in here Categories. Similarly for the Pages table. Also, note that Django has also created a few other tables. Of particular use is the User table which you can use to add other users who can use the admin interface and add/edit/delete records.
The admin interface is really handy if you want to check your data. But it can also be heavily customized and tailored to the needs of your client. In the official Django tutorial they show a number of ways to customize the admin interface (see https://docs.djangoproject.com/en/dev/intro/tutorial02/ for more details.)
For now, you can settle with the barebones standard admin interface. Ho Hum.
Creating a Population Script
Invariably, during the course of development you will add a model/table or modify a model/table. When you do this you will have to run python manage.py syncdb again, which will require you to re-create the entire database and lose all your test data. Grunt!
Since that is a total pain it is good practice to create a population script for your database which populates your database with test data. So create a file called populate.py and add the following lines of code:
from rango.models import Category, Page

c = Category(name='home')
c.save()
Page(category=c, title='Home - Property Search', url='http://www.home.co.uk', views=0).save()
Page(category=c, title='Right Move', url='http://www.rightmove.co.uk', views=0).save()
c = Category(name='sport')
c.save()
Page(category=c, title='BBC Sport', url='http://www.bbc.co.uk/sport/0/', views=0).save()
Page(category=c, title='Sky Sports', url='http://www.skysports.com/', views=0).save()
Page(category=c, title='Sports News', url='http://www.sport.co.uk/', views=0).save()
c = Category(name='fun')
c.save()
Page(category=c, title='The Fun Theory', url='http://www.thefuntheory.com/', views=0).save()
Page(category=c, title='Comp. Sci. for Fun', url='http://www.cs4fn.org/', views=0).save()
Then run python manage.py shell and import populate. Now that your database has some reasonable test data you can carry on developing - and when you regenerate the database you can quickly and easily regenerate the data.
Showing the data from Models in Templates (via Views)
The basic work flow for displaying data from models is as follows:
- Import the desired models into views.py
- In the view, query the model to get the data you want to present
- Pass the data from the model into the context variable
- Let the template handle present the data
Showing Categories on the Homepage
So let’s get started and show the categories of pages on the index page.
- In rango/views.py add and update the code as follows:
# Import Category model
from rango.models import Category, Page

def index(request):
        template = loader.get_template('rango/index.html')

        # Request all the categories.
        cat_list = Category.objects.all()
        # Put the data into the context
        context = RequestContext(request,{ 'cat_list': cat_list })

        return HttpResponse(template.render(context))
- Now in the templates/rango/index.html, update it as follows:
<BODY>
Rango says: Hello World!
{% if cat_list %}
        <UL>
        {% for cat in cat_list %}
                <LI>{{ cat.name }}</LI>
        {% endfor %}
        </UL>
{% else %}
        <P>No categories at present.</P>
{% endif %}

</BODY>
The code in the view is pretty straightforward - all the Category objects are fetched via the model, and pass through to the Template using the context variable. However, in the template we have used Django’s template language to instruct how the page should be constructed. First, we test to see if cat_list contains any data, if so, we progress to build an unordered list. Note that the template code is very similar to Python and is always encased with {% and %}, while the variables are referenced with {{ and }} as in the example of cat.name. The for loop iterates through the dictionary of Category objects and extracts the name of the category. If the dictionary is empty then the template only includes the message to say no categories are present.
As we progress through the tutorial we shall use more of Django’s template language. For an overview see: https://docs.djangoproject.com/en/dev/topics/templates/
Showing Pages on a Details page
According to the specification, we would like to show the Pages that are associated with each Category. So we need to think about how we can design our urls (and url patterns). One way we could approach this is to use the Category id within the url string, something like rango/category/1/ and rango/category/2/ to refer to Categories 1 and 2, respectively. Another way we could approach this is to encode the Category id as a GET parameter.
Here, we will employ a variant of the first approach (and later in this tutorial we will use the second approach). Instead of using an id in the url, we want to make a more readable url string, so we will use the category name within the url, so that we have: /rango/fun/ or /rango/sport/, for example. Much more readable, eh! Also, we could infer a Category and guess urls like /rango/work/ or /rango/hotpics/, etc. This is nice from a usability point of view, because the urls are readable, meaningful and predictable, see http://en.wikipedia.org/wiki/Clean_URL .
So let’s get started. To do this, we will need to:
- Create a new view, category in views.py, which accepts category_name parameter.
- Create a new template category.html in templates/rango/
- Update the urlpatterns to map the new category view to a url pattern in urls.py
- Update the existing index view in views.py to pass through the urlstring of category pages.
- Update the existing template index.html to include these urlstrings
- So first lets sort out our views.py, and add in the category view:
def category(request, category_name_url):
        template = loader.get_template('rango/category.html')

        category_name = decode_category(category_name_url)
        context_dict = {'category_name_url': category_name_url,
                                'category_name': category_name}
        # Select the Category object given its name.
        # In models, we defined name to be unique,
        # so there so only be one, if one exists.
        cat = Category.objects.filter(name=category_name)
        if cat:
                # selects all the pages associated with the selected category
                pages = Page.objects.filter(category=cat)
                context_dict['pages'] = pages

        context = RequestContext(request, context_dict)
        return HttpResponse(template.render(context))
- Then, create the new template, category.html:
<BODY>
<H2>{{category_name}}</H2>

{% if pages %}
        <UL>
        {% for page in pages %}
                <LI><A HREF="{{page.url}}">{{page.title}}</A></LI>
        {% endfor %}
                </UL>
{% else %}
        <P>No pages in category.</P>
{% endif %}
</BODY>
From the context passed in from the category view, we can pull out the Category name along with a list of the pages. For each page we can provide the title and provide a link to its url.
- Update the urlpatterns in rango/urls.py, and add in the following pattern:
url(r'^cat/(?P<category_name_url>\w+)', views.category, name='category'),
This pattern matches any text between the start and finish of the string, and assigns it to the variable category_name, this is then passed to the method views.category.
- In views.py, we now need to update the index method, so that for each of the categories a link is provided so that users can click on the category and see the pages associated with that category. After we obtain the list of categories with cat_list = Category.objects.all() add the lines below:
# add the cat_url data to each category
for cat in cat_list:
    category_name = cat.name
    cat.url = encode_category(category_name)
This associates a url with each category, however, you’ll need to add the encode and decode category methods to views.py:
def encode_category(category_name):
        # returns the name converted for insert into url
        return category_name.replace(' ','_')

def decode_category(category_url):
        # returns the category name given the category url portion
        return category_url.replace('_',' ')
Note these methods are assuming that there are no underscores in the category names nor any special characters.
- Now the last thing we need to do is update the index.html template so that each category has a link to the specified category page, update the for loop as follows:
{% for cat in cat_list %}
        <LI><A HREF="/rango/cat/{{cat.url}}">{{cat.name}}</A></LI>
{% endfor %}
If we now run python manage.py runserver and visit http://127.0.0.1/rango it should be possible to explore the different categories and visit different pages. You can even try to invent a new category via the url, such as: http://127.0.0.1/rango/cat/xxx or whatever. Even though category xxx doesn’t exist a page is displayed showing this category (all be it without any pages associated with it).
Note: This is a pretty basic naming convention to associate urls to categories - however it is not particularly robust as our encode/decode methods are very easy to break. Also, it would be nicer if our model took care of creating this url field, automatically (see lab exercise).
Using Forms
Okay, so viewing the data is one thing, and while you could enter data through the admin interface, it is pretty handy to be able to create custom forms that let users enter in data (without needing to go through the admin interface).
To help us do this Django provides ModelForms which are associated to models. The basic workflow is:
- Create a ModelFrom for each model
- Customize the forms as required/desired
- Create/update a view to handle the form: (i) display the form, (ii) save the form data, and (iii) flag up any errors when input data into the form.
- Create/update a template to display the form
- Add a url pattern to map to the view
Adding Categories
- In rango/models.py add the following lines of code to create forms for the models Category and Page:
from django import forms

# create a form for Category and Page
class CategoryForm(forms.ModelForm):
        name = forms.CharField(max_length=50,
                help_text='Please enter the name of the category.')
        class Meta:
                # associate the model, Category, with the ModelForm
                model = Category

class PageForm(forms.ModelForm):
        title = forms.CharField(max_length=100,
                help_text='Please enter the title of the page.')
        url = forms.CharField(max_length=200,
                help_text='Please enter the URL of the page.')
        class Meta:
                model = Page
                # select which fields will be present on the form
                # (i.e. we are hiding the foreign key and views fields)
                fields = ('title','url')
- Django provides a number of ways to customize and tailor the forms that are created. Here we have specified the type of widget associated with the fields that will be displayed.
Aside from forms.CharField, Django provides IntegerField, ChoiceField, and many others depending on your needs. In the Meta class, we need to associate the Form with a particular model. This automatically creates the form in the image of the model, and also the handles the saving of the data to the model. In PageForm, the fields property in Meta provides a way to simplify the form and only show particular fields from the model (Here, we intend to automatically assign the category of the page, and set the number of views to zero initially, so we don’t want to have them on the form). Alternatively, we could have used the property exclude to remove particular fields from the form. See https://docs.djangoproject.com/en/dev/topics/forms/ for more details about how to customize and tailor your forms.
- Now you need to create a view to display and handle the posting of the data. Continue by defining the view et al for categories and come back to creating a view et al for pages.
from django.shortcuts import render_to_response


def add_category(request):
        # immediately get the context - as it may contain posting data
        context = RequestContext(request)
        if request.method == 'POST':
                # data has been entered into the form via Post
                form = CategoryForm(request.POST)
                if form.is_valid():
                        # the form has been correctly filled in,
                        # so lets save the data to the model
                        cat = form.save(commit=True)
                        # show the index page with the list of categories
                        return index(request)
                else:
                        # the form contains errors,
                        # show the form again, with error messages
                        pass
        else:
                # a GET request was made, so we simply show a blank/empty form.
                form = CategoryForm()

        # pass on the context, and the form data.
        return render_to_response('rango/add_category.html',
                {'form': form }, context)
You’ll also need to add in import statements to bring in the CategoryForm and PageForm from rango/models.py.
Now, this block of code introduces a few new pieces of key functionality.
First you are accessing the context to see what type of request is being made (i.e. is it a POST). This is so you can handle different requests appropriately: in this case, whether you try to save the data from the form, or simply show the data. Essentially, this add_category method handles three possibilities:
- showing the form,
- saving the data to the model, and then passing the request on to be handled by the category view, and
- if there are errors, show them on the form.
Second, a Django shortcut render_to_response has been introduced. This method lets you pass in the template, data specific to the view and the context, instead of creating a template, calling render, etc.
Third, Django’s form machinery has been used to process the data returned by the POST. It not only saves the form to the data, but will include any error messages for each field in the form variable (which you can pass on to the template to display). Let’s take look at the template code, and add a HTML FORM to capture the data and to make the POST request. In templates/rango/, you will need to create add_category.html to handle the new functionality of adding a category.
<HTML>
<HEADER><TITLE>Rango</TITLE></HEADER>
<BODY>
        <FORM id="cat_form" method="post" action="/rango/cat_add/">
                {% csrf_token %}
                {% for hidden in form.hidden_fields %}
                        {{ hidden }}
                        {% endfor %}

                {% for field in form.visible_fields %}
                        {{ field.errors }}
                        {{ field.help_text}}
                        {{ field }}
                {% endfor %}
                <INPUT type="submit" name="submit" value="submit" />
        </FORM>
<BODY>
</HTML>
Now that you have added in the HTML FORM and set it up to POST to /rango/cat_add/, let go through the template code. Within the form, you have included the hidden fields that are not to be displayed to the used, and the visible fields (this is controlled by the fields or exclude properties in the Meta class associated with the ModelForm). Within the visible fields, you are able to show any field errors along with the help text you defined along the field input box (or widget) as defined by the CategoryForm. Finally, you added a submit button to perform the POST. The hidden fields are included because they contain data which is also in the model - but not shown, so when the post comes back you may want to access this data.
Note the inclusion of {% csrf_token %}, which is a cross site request forgery token. This helps to protect and secure the form/post and is required by Django’s Framework. For more details about using the Cross Site Request Forgery protection tokens, see: https://docs.djangoproject.com/en/dev/ref/contrib/csrf/
- Now you need to add the following url pattern to rango/urls.py:
url(r'^cat_add/$', views.add_category, name='add_category'),
With everything set up to add a category visit: http://127.0.0.1:8000/rango/cat_add/ and try entering in a new category.
- What happens when you don’t enter in a category name, and hit the submit button? * What happens when you try to add in a category that already exists?
To let users of the application enter their own categories, add <A HREF=”/rango/cat_add/”> Add Category </A> to the rango/index.html template.
Adding Pages
Okay, now repeat the above workflow for adding pages. You have already added the PageForm in models.py (see above) so move onto the next steps.
In rango/views.py, you need an add_page view that for a given category_name, adds a page to that category. When the page is added the view will return the category view, otherwise it will return the form to insert a page (so you will need to add a new template for this).
def add_page(request, category_name_url):
        context = RequestContext(request)

        category_name = decode_category(category_name_url)
        if request.method == 'POST':
                form = PageForm(request.POST)
                if form.is_valid():
                        # this time we cant commit straight away
                        # because not all fields are populated
                        page = form.save(commit=False)
                        # retrieve and assign the category object to the new page
                        cat = Category.objects.get(name=category_name)
                        page.category = cat
                        # also plug in a default value for the no. of page views
                        page.views = 0
                        page.save()
                        # Now that the page is saved, display the category instead.
                        return category(request, category_name)
                else:
                        print form.errors
        else:
                form = PageForm()

        return render_to_response( 'rango/add_page.html',
                        {'category_name_url': category_name_url,
                                'category_name': category_name, 'form': form },
                        context)
- Create a new template rango/add_page.html:
<HTML>
<HEADER>
        <TITLE>Rango</TITLE>
        </HEADER>
<BODY>
        <FORM id="page_form" method="post"
                action="/rango/page_add/{{category_name_url}}">
                {% csrf_token %}
                {% for hidden in form.hidden_fields %}
                        {{ hidden }}
                {% endfor %}

                {% for field in form.visible_fields %}
                        {{ field.errors }}
                        {{ field.help_text}}
                        {{ field }}
                        {% endfor %}
                <INPUT type="submit" name="submit" value="submit" />
        </FORM>

</BODY>
</HTML>
- Now you wil need to add the following url pattern to rango/urls.py:
url(r'^page_add/(?P<category_name_url>\w+)', views.add_page, name='add_page'),
Finally, add in a link from category to page_add in category.html .i.e. <A HREF=”/rango/page_add/{{category_name_url}}”> Add page </A>.
All going well you’ll be able to add pages to categories. Try adding a page to a category, for example, test and www.test.com.
Cleaner Forms
Since the we have defined the url in Page to be a URLField it is expecting a properly and fully formed URL. Since it is rather annoying to require the user to type in: http://www.test.com, we can use define/override the clean method provided by ModelForms. So in the PageForm class include the following code that checks if “http://” was included or not, and if not, it adds “http://” to the string.
def clean(self):
        cleaned_data = self.cleaned_data
        url = cleaned_data.get('url')
        if not url.startswith('http://'):
                url = 'http://' + url
        cleaned_data['url'] = url
        return cleaned_data
This trivial example shows how we can clean the data being passed through the form. This is pretty handy, essentially when particular fields need to have default values or data within the form is missing and we need to handle such data entry problems.
Exercises
- The encoding and decoding of the Category name to a URL is pretty sloppy. Create a better way for encoding/decoding the url/name so that it handles special characters and ignores case.
- Now, instead of messing about with the url encoding/decoding in the View, fix your code to let the Model handle this responsibility directly.
- Customize the Admin Interface - so that for the Pages table the list view also displays the category name and the category url name (i.e. the encoded category name).